How to Sew Easy and Colorful Bandana Pillows
Project Overview
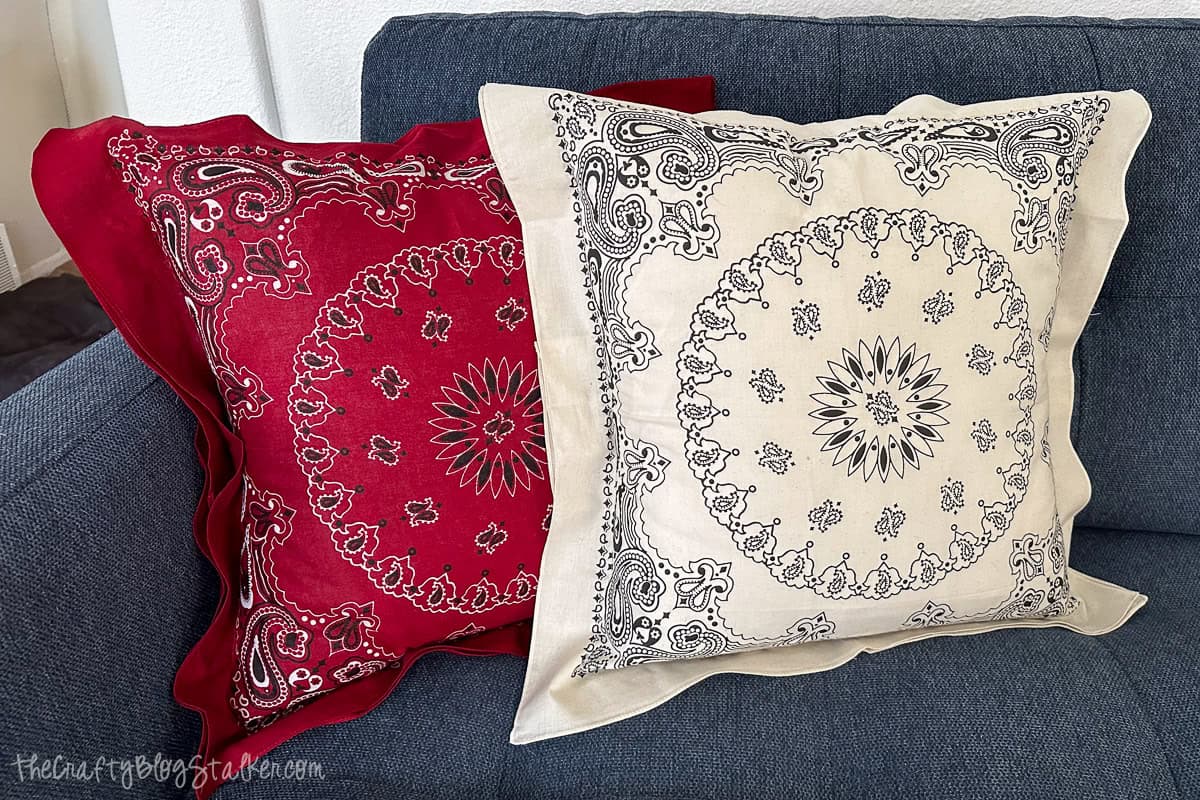
Turn basic bandanas into fun, colorful pillows-this simple sewing tutorial shows you how to make bandana pillows in no time.
If you've got a couple of colorful bandanas and a few minutes to spare, you're in for a fun and easy project.
Bandana pillows are quick, budget-friendly, and just the right amount of cottage core.
They're perfect for adding color to a couch, bed, or an outdoor chair.
Grab your sewing machine and turn those bandanas into something cozy and cute!
If videos are your thing, you're in luck-I've got a full tutorial ready for you!
Subscribe to my YouTube channeland stay inspired with every new project.
I use three 22-inch bandanas for one pillow. One for the front and two for the back.
Begin by ironing the three bandanas. They will have pretty deep creases from their packaging.
Pay attention to the hem of the bandanas. This is how you will identify the right and wrong sides.
The tiny hem is folded under and sewn to prevent the fabric from fraying.
The folded hem is visible on the back side, and only the stitch from the hem can be seen on the front.
Layer two bandanas together, squaring them up as much as possible, and lining them up on a self-healing cutting mat.
Note: Bandanas are not meticulously made and are not perfectly square, so lining them up won't be perfect. Just do the best that you can.
Align a quilting ruler at 13 inches and cut with a rotary cutter.
The top pieces are unnecessary, so you can keep them for scrap or throw them away.
The raw edge of each bandana piece needs to be hemmed so the edge doesn't fray.
I like to pin and iron my edges before I sew.
Turn in the raw edge â ?inch and pin in place. I started on the left side, then the center, then the right side, and did one more pin between each center section.
After the edge is pinned, I applied an iron to secure the fold and keep it nice and straight.
Then I folded the edge again, this time at ½ inch, pinned it the same way as before, and ironed it flat.
Repeat pinning on the second bandana that was cut.
Guide the edge of the fabric along the edge of the sewing foot and create a long straight stitch along the length of the fabric.
Repeat this with the second bandana hem and remove the pins.
Place the whole bandana, right-side down, on the cutting mat, aligning it on the mat's baseline.
Layer one of the half bandanas on top, with the correct side facing you. Insert pins at the corners to keep the pieces aligned.
Carefully lift the bandanas and turn so the pinned piece is at the top.
Layer the second half on top, with the correct side facing up. Line up the edges and corners, and pin them together.
I also added pins to the center edges to keep everything correctly aligned.
Line the pillow case up as best as you can on the baseline of the cutting mat.
Lay the quilting ruler at the two-inch line, and create a line. This will be the sewing line.
You can use an ink-dispensing pen made just for sewing, but I don't have one, so I used a regular pencil.
Carefully pick up the pillow cover and rotate it 90 degrees to create the line on the next edge. Repeat until you have made the marked line on all four sides of the pillow cover.
Carefully lift the pillow cover, take it to your sewing machine, and sew along those marked lines.
After sewing all the way around the pillow case, you are done!
All that is left is to open the flap in the back and stuff the pillow insert into the new pillow case.
Make sure to push the pillow corners into the corners of the pillowcase, and you are done!
This bandana pillow cover came together so quickly!
I loved it so much that I made two more. Now, I have red, white, and blue pillows, perfect for summer.
Throw pillows are one of my favorite DIY projects because they come together quickly and can completely change the look of a room!
Here are a few more fun ideas.
Hi, I'm Katie!
I'm so glad you're here. Want to make something fabulous? I'm here to help!
Materials Needed
- Fabric (cotton, linen, or specialty fabric)
- Thread (matching or contrasting colors)
- Sewing needles or sewing machine
- Fabric scissors
- Pins and pincushion
- Measuring tape
- Iron and ironing board
- Pattern or template
Step-by-Step Instructions
Prepare Your Materials
Gather all the required materials and tools. Make sure you have everything listed in the materials section before starting.
Set Up Your Workspace
Find a clean, well-lit area to work. Cover your surface with newspaper or a craft mat to protect it.
Follow the Main Steps
Carefully follow the instructions step by step. Take your time and don't rush through any part of the process.
Add Personal Touches
Once you've completed the basic project, feel free to add your own creative touches and personalization.
Final Assembly
Put all the pieces together according to the instructions. Double-check that everything is secure and properly attached.
Pro Tips
💡 Tip: Take your time and enjoy the creative process
💡 Tip: Don't be afraid to experiment with different colors or materials
💡 Tip: If you make a mistake, don't worry - it's all part of learning
💡 Tip: Share your finished project with friends and family
💡 Tip: Take photos of your progress to document your crafting journey
You Might Also Like


References & Further Reading
Explore these trusted resources to deepen your crafting knowledge and find more inspiration for your next project.
- Do It Yourself — Wikipedia Overview of DIY culture, history, and common techniques across woodworking, home improvement, and crafting.
- Handicraft — Wikipedia Background on traditional handicrafts, materials, and the cultural significance of handmade goods.
- Instructables Community-driven DIY project library with step-by-step photos, videos, and printable instructions.
- Woodworking — Wikipedia Techniques, tools, joinery methods, and the history of working with wood as a craft.
- Sewing — Wikipedia History and modern practice of sewing, including stitches, equipment, and fabric choices.
- Bob Vila Trusted home improvement, tool reviews, and illustrated how-to guides from a household name.
- Papercraft — Wikipedia Art forms that use paper as the primary medium, from origami to paper-mache.
- Michaels — Project Ideas Project walkthroughs, material lists, and weekly craft ideas from a major arts & crafts retailer.