How to Paint Glass Drinkware
Project Overview
Learn how to paint glass drinkware to match your kitchen. Simple steps, lasting results, and colors that fit your style perfectly.
Isn't life so much better with a pop of color in the kitchen?
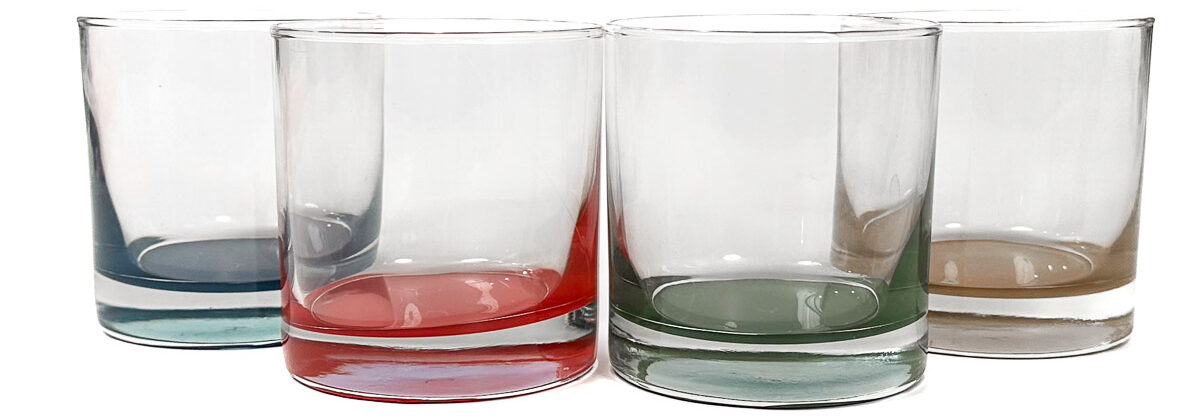
I'll show you how to paint your glass drinkware to match your favorite color scheme and give four plain glasses a fresh new look.
This is a quick, easy project that's great for beginners or anyone who loves a simple weekend craft.
You'll be surprised how a little paint can turn ordinary glass into something worth showing off.
PaintingTime: 10 minutes
Curing Time:5-8 hours
If videos are your thing, you're in luck-I've got a full tutorial ready for you!
Subscribe to my YouTube channeland stay inspired with every new project.
The paint used is very important. Read the directions and make sure it is top-rack dishwasher safe.
This tutorial is so easy, I only have a few images to share.
Clean the glasses, and wipe the bottom with isopropyl alcohol.
Drop a good-sized plop of paint onto the tumbler base.
Use a popsicle stick to smooth out the paint.
The paint doesn't need to be perfect, but should be evenly spread.
If you are using a different paint than I am, be sure to follow the instructions on the packaging.
Let the glasses dry completely. I applied the paint pretty thick, so it took 2 hours to dry.
Place the tumblers on a baking sheet and place them in a cooled oven.
Set the oven temperature to 350º F, and once the oven is to temperature, set the timer for 30 minutes.
After 30 minutes, turn the oven off, leave the glasses in the oven without opening the door, and cool to room temperature. This took about 3-4 hours.
I absolutely love how these turned out.
I think it is so cool how the color travels up the side of the glass, even though paint was only applied to the bottom.
While the paint is top-rack dishwasher safe once cured, it will last longer if handwashed.
But if you aren't too worried about it, enjoy the easy clean-up with the dishwasher.
Don't put your craft supplies away yet. There are more fun things to make to accessorize your kitchen! I don't think so! Here are a few more fun ideas.
Hi, I'm Katie!
I'm so glad you're here. Want to make something fabulous? I'm here to help!
Materials Needed
- Colored cardstock or patterned paper
- Craft scissors or paper cutter
- Double-sided tape or glue stick
- Ruler and pencil
- Decorative elements (ribbons, stickers, washi tape)
- Cutting mat
- Scoring tool or bone folder
- Embellishments (buttons, sequins, stamps)
Step-by-Step Instructions
Prepare Your Materials
Gather all the required materials and tools. Make sure you have everything listed in the materials section before starting.
Set Up Your Workspace
Find a clean, well-lit area to work. Cover your surface with newspaper or a craft mat to protect it.
Follow the Main Steps
Carefully follow the instructions step by step. Take your time and don't rush through any part of the process.
Add Personal Touches
Once you've completed the basic project, feel free to add your own creative touches and personalization.
Final Assembly
Put all the pieces together according to the instructions. Double-check that everything is secure and properly attached.
Pro Tips
💡 Tip: Take your time and enjoy the creative process
💡 Tip: Don't be afraid to experiment with different colors or materials
💡 Tip: If you make a mistake, don't worry - it's all part of learning
💡 Tip: Share your finished project with friends and family
💡 Tip: Take photos of your progress to document your crafting journey
You Might Also Like
References & Further Reading
Explore these trusted resources to deepen your crafting knowledge and find more inspiration for your next project.
- Do It Yourself — Wikipedia Overview of DIY culture, history, and common techniques across woodworking, home improvement, and crafting.
- Handicraft — Wikipedia Background on traditional handicrafts, materials, and the cultural significance of handmade goods.
- Instructables Community-driven DIY project library with step-by-step photos, videos, and printable instructions.
- Woodworking — Wikipedia Techniques, tools, joinery methods, and the history of working with wood as a craft.
- Sewing — Wikipedia History and modern practice of sewing, including stitches, equipment, and fabric choices.
- Bob Vila Trusted home improvement, tool reviews, and illustrated how-to guides from a household name.
- Papercraft — Wikipedia Art forms that use paper as the primary medium, from origami to paper-mache.
- Michaels — Project Ideas Project walkthroughs, material lists, and weekly craft ideas from a major arts & crafts retailer.