Mint To Be Tic Tac Labels for a Wedding
Project Overview
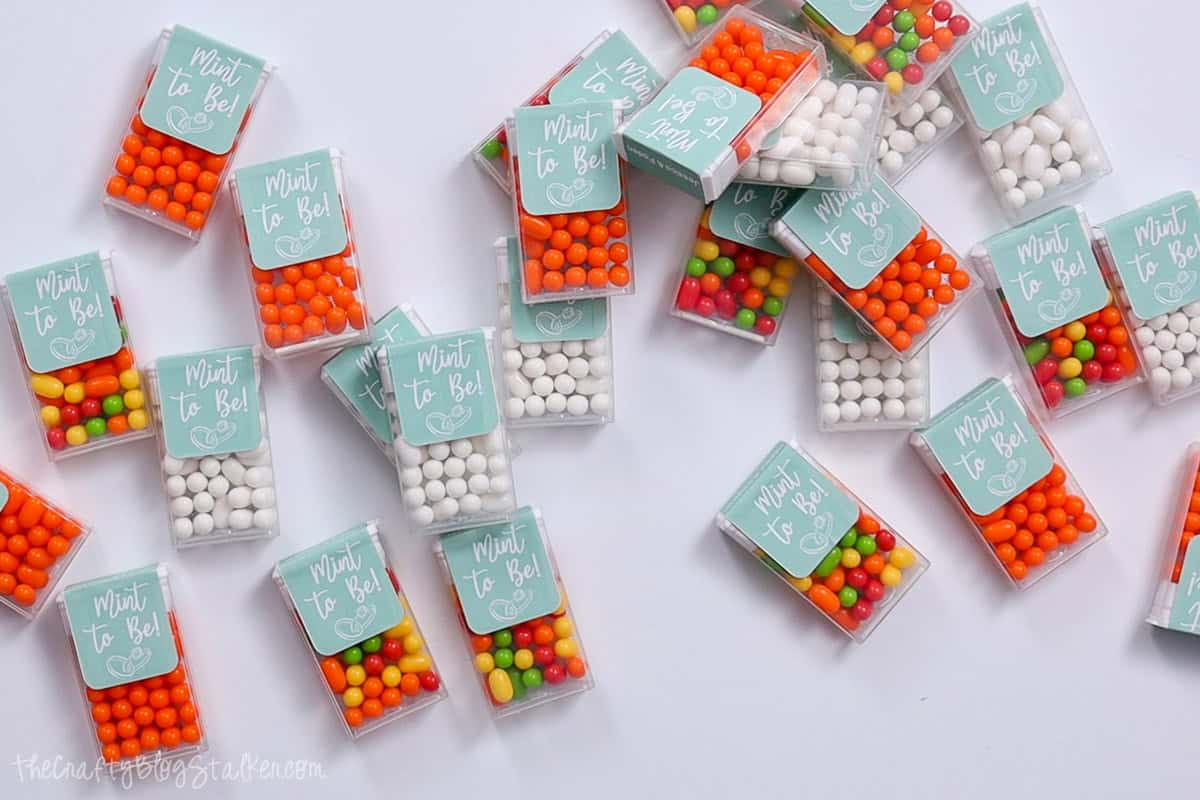
Make Mint To Be Tic Tac Labels for your wedding! Personalize them to make your favors special, affordable, and loved by all your guests.
Looking to add a special touch to your wedding favors?
These personalized Mint To Be Tic Tac Labels are just what you need.
They fit perfectly over .63-ounce Tic Tac containers and can be customized with the bride and groom's names!
Follow this simple tutorial to create favors that your guests will absolutely adore!
If videos are your thing, you're in luck-I've got a full tutorial ready for you!
Subscribe to my YouTube channeland stay inspired with every new project.
This digital media is forPersonal Use Only- You do not have permission to redistribute.
For the following steps, I'll be using Cricut Design Space.
If you use Silhouette Studio or a different design software, your steps may be different than mine.
To start, upload the SVG into Cricut Design Space and add it to your Canvas.
The file is made to fit the .67-ounce size container, but the file can be resized as needed for other container sizes.
Open the text box and type in the customization. It could be names, Mr & Mrs, or whatever fits the theme.
I changed the font to Mochiy Pop One.
Decrease the font size, rotate the names so they are vertical, and change the color to white.
Highlight all layers and center align the text vertically and horizontally on the design.
Again, highlight the entire design and this time select the Flatten icon. Flatten is what turns the design into a print and cut.
Click on Make, and this screen is the Mat Preview page.
I can see on my mat that I have one label, but I need to make 30, so in Project Copies I change that number to 30.
Click Continue on the Mat Preview page and then Send to Printer.
Since all the sheets are the same, I changed the number of prints to 3 so I can print them at once instead of at each mat prompt.
I printed my labels on myHP Envy, but any home or office printer will work.
Back in Cricut Design Space, it is time to select the material settings.
I searched for Printable Vinyl and selected that as my setting.
Apply the sticker sheet of labels onto a StandardGrip mat, and load the mat into the Cricut cutting machine.
Now that the labels are printed and cut, I can apply the new labels to the tic tac containers.
Peel the sticker label from the sheet and center it on top of the container, making sure to cover the original label.
Then press down the front and the back. Easy Peasy!
These wedding favors turned out so cute and I can't wait to hand them out at the upcoming bridal shower!
Materials Needed
- Basic craft supplies
- Scissors or cutting tools
- Adhesive (glue, tape)
- Measuring tools
- Decorative elements
- Protective workspace covering
- Storage containers
- Cleaning supplies
Step-by-Step Instructions
Prepare Your Materials
Gather all the required materials and tools. Make sure you have everything listed in the materials section before starting.
Set Up Your Workspace
Find a clean, well-lit area to work. Cover your surface with newspaper or a craft mat to protect it.
Follow the Main Steps
Carefully follow the instructions step by step. Take your time and don't rush through any part of the process.
Add Personal Touches
Once you've completed the basic project, feel free to add your own creative touches and personalization.
Final Assembly
Put all the pieces together according to the instructions. Double-check that everything is secure and properly attached.
Pro Tips
💡 Tip: Take your time and enjoy the creative process
💡 Tip: Don't be afraid to experiment with different colors or materials
💡 Tip: If you make a mistake, don't worry - it's all part of learning
💡 Tip: Share your finished project with friends and family
💡 Tip: Take photos of your progress to document your crafting journey
You Might Also Like
References & Further Reading
Explore these trusted resources to deepen your crafting knowledge and find more inspiration for your next project.
- Do It Yourself — Wikipedia Overview of DIY culture, history, and common techniques across woodworking, home improvement, and crafting.
- Handicraft — Wikipedia Background on traditional handicrafts, materials, and the cultural significance of handmade goods.
- Instructables Community-driven DIY project library with step-by-step photos, videos, and printable instructions.
- Woodworking — Wikipedia Techniques, tools, joinery methods, and the history of working with wood as a craft.
- Sewing — Wikipedia History and modern practice of sewing, including stitches, equipment, and fabric choices.
- Bob Vila Trusted home improvement, tool reviews, and illustrated how-to guides from a household name.
- Papercraft — Wikipedia Art forms that use paper as the primary medium, from origami to paper-mache.
- Michaels — Project Ideas Project walkthroughs, material lists, and weekly craft ideas from a major arts & crafts retailer.