21 Cricut Wedding Gift Ideas
Project Overview
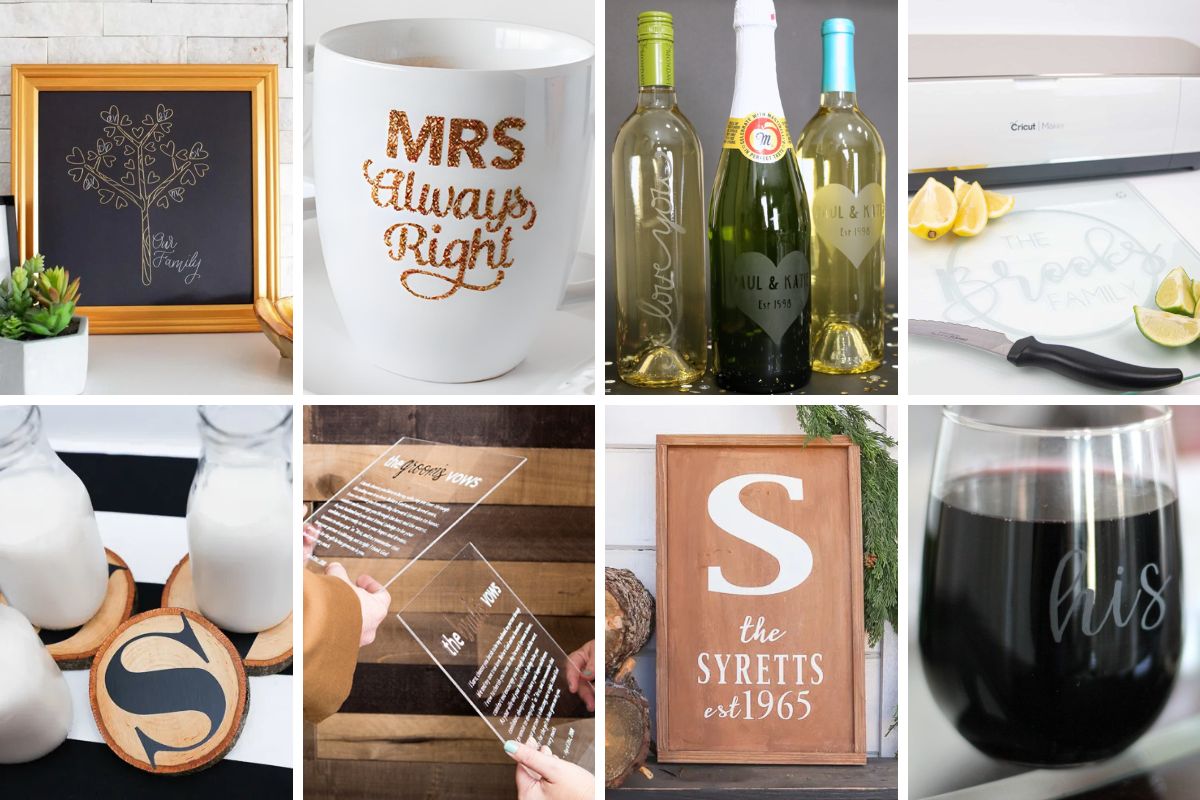
Create unforgettable wedding gifts with your Cricut! These 21 DIY ideas, like custom wine glasses and wall art, are perfect for adding a personal touch.
When someone you care about marries, it's an exciting time to celebrate!
What better way to show your love and support than with a thoughtful, handmade gift?
A personalized DIY present is unique and shows how much effort and heart you put into making something special just for them.
The happy couple will absolutely love it-and who knows, it might even become one of their favorite keepsakes from their special day!
Visit the website for step-by-step directions. All links will open in the same tab.
Learn how to make a personalized etched glass wine bottle! This DIY project is the perfect thoughtful gift for any special occasion or celebration.
Impress your loved ones with a custom cutting board! Dive into our guide for step-by-step instructions.
Learn how to craft a paper flower shadow box with a Cricut! A perfect DIY project for personalized gifts or adding charm to your decor.
Give the gift of creativity with a Money Jar wedding gift! Follow this DIY tutorial to make a thoughtful and practical present the happy couple will love.
Add some sparkle to your gifts with DIY gold glitter mugs! This tutorial walks you through making the perfect Mr. Right and Mrs. Always Right set.
Craft a custom ceramic platter with a vinyl monogram! This DIY project is simple, budget-friendly, and perfect for giving as a wedding or engagement gift.
Learn how to etch personalized Pyrex baking dishes with your Cricut! A simple and thoughtful DIY gift idea that's perfect for any occasion.
Make a one-of-a-kind doormat with your Cricut Maker! This easy DIY project is ideal for sprucing up your home or gifting to a newlywed couple.
With your Cricut Maker, you can make a unique doormat in under two hours! It's perfect for your home or as a thoughtful gift for newlyweds or friends.
Elevate your wine game with personalized wine buckets! Learn how to use frosted vinyl for a chic etched design that is perfect for gifts or entertaining.
Craft a personalized wedding tray for the bride and groom! This DIY gift idea is simple, stylish, and perfect for adding a special touch to their big day.
Create custom slate coasters with your Cricut for the perfect gift! Ideal for housewarmings, weddings, or adding a personalized touch to your decor.
Make a personalized "Just Married" window cling with vinyl! A simple DIY for adding charm to the newlyweds' car or creating seasonal decor with ease.
These are ideal for a wedding ceremony or displaying your unique words at home as a constant reminder of your love.
Add charm to your bedroom with personalized His and Hers pillowcases! A fun DIY project to craft heartfelt and stylish home decor after the big day.
Craft custom monogram wood slice coasters! A simple and heartfelt DIY gift using the couple's last name initial-perfect for adding a personal touch.
Craft a unique Cricut etched cutting board for someone special! A simple and elegant way to create a personalized gift they'll use and love.
Learn how to engrave stainless steel servers with your Cricut Maker! This beginner-friendly tutorial is perfect for creating unique, personalized gifts.
Make your own etched wine and champagne glasses that look high-end but cost a fraction of the price! A stylish DIY perfect for gifts or entertaining.
Create a personalized vinyl monogram key hook for the perfect wedding gift! It's a thoughtful way to celebrate the happy couple, easy to make and stylish.
Craft a framed family tree with Cricut's Foil Transfer Kit! This elegant project is easy to make and ideal for celebrating your family.
There are so many fun things to make with your Cricut. Here are a few more fun ideas.
Materials Needed
- Colored cardstock or patterned paper
- Craft scissors or paper cutter
- Double-sided tape or glue stick
- Ruler and pencil
- Decorative elements (ribbons, stickers, washi tape)
- Cutting mat
- Scoring tool or bone folder
- Embellishments (buttons, sequins, stamps)
Step-by-Step Instructions
Prepare Your Materials
Gather all the required materials and tools. Make sure you have everything listed in the materials section before starting.
Set Up Your Workspace
Find a clean, well-lit area to work. Cover your surface with newspaper or a craft mat to protect it.
Follow the Main Steps
Carefully follow the instructions step by step. Take your time and don't rush through any part of the process.
Add Personal Touches
Once you've completed the basic project, feel free to add your own creative touches and personalization.
Final Assembly
Put all the pieces together according to the instructions. Double-check that everything is secure and properly attached.
Pro Tips
💡 Tip: Take your time and enjoy the creative process
💡 Tip: Don't be afraid to experiment with different colors or materials
💡 Tip: If you make a mistake, don't worry - it's all part of learning
💡 Tip: Share your finished project with friends and family
💡 Tip: Take photos of your progress to document your crafting journey
You Might Also Like
References & Further Reading
Explore these trusted resources to deepen your crafting knowledge and find more inspiration for your next project.
- Do It Yourself — Wikipedia Overview of DIY culture, history, and common techniques across woodworking, home improvement, and crafting.
- Handicraft — Wikipedia Background on traditional handicrafts, materials, and the cultural significance of handmade goods.
- Instructables Community-driven DIY project library with step-by-step photos, videos, and printable instructions.
- Woodworking — Wikipedia Techniques, tools, joinery methods, and the history of working with wood as a craft.
- Sewing — Wikipedia History and modern practice of sewing, including stitches, equipment, and fabric choices.
- Bob Vila Trusted home improvement, tool reviews, and illustrated how-to guides from a household name.
- Papercraft — Wikipedia Art forms that use paper as the primary medium, from origami to paper-mache.
- Michaels — Project Ideas Project walkthroughs, material lists, and weekly craft ideas from a major arts & crafts retailer.