How to Carve Wood Spoons
Project Overview
Learn how to carve wood spoons with simple steps that help you create useful, handcrafted pieces for your kitchen or gifting.
If you've ever wondered how to carve wood spoons but were not sure where to begin, this is an excellent place tos start.
Spoon carving is slow, calming work that gives you a chance to unwind while creating something useful and beautiful.
It is perfect for beginners who want a simple woodworking project and invites patience rather than pressure.
I am sharing the tools I used and the steps that helped me get started, so you can enjoy the process and make a spoon that feels uniquely yours.
Create a template by hand-drawing or tracing a spoon onto your piece of wood.
I used a piece of ¾" mahogany for this spoon, but if you want a deeper spoon bowl, you will need a thicker piece of wood.
The type of wood also matters. If you are making spoons for decoration or props, then the species isn't that important. If you are using the spoons for cooking, I suggest talking to your local lumberyard or hobby store for recommendations.
Using a bandsaw, cut out the traced template of your spoon. Some people prefer to carve out the spoon bowl before cutting out the template, but I like it this way.Â
After cutting the spoon shape, you will be left with a spoon blank.
Clamp this down to a study work surface before you begin carving.
Once clamped, mark the area where the spoon bowl interior will be. You'll want a small lip for sanding and rounding the spoon.Â
Begin carving the bowl of the spoon with the spoon gouge and hook knife.
Carving spoons is really an art form, and you just have to find what is most comfortable for you!
I prefer to start with the hook knife and smooth everything out with the gouge.Â
Using the roughing knife, shape out your handle.
Be careful with this part, too much pressure and you can snap the handle.
Never underestimate the sharpness of these knives; it is very easy to take off a large chunk, so go slow and take your time.Â
When the carving is complete, it is time to start sanding.
Use the bench sander to round off the back of the spoon.
This is also a bit of an art form, and you have to find the movements that work for you.
Be careful with the bench sander; it runs at a high speed and removes wood quickly.Â
Sand the handle with the bench sander, and finish up with very fine-grit sandpaper by hand.
Always start with a low grit and move up to extra fine. You may need to continue alternating with the bench sander and sandpaper until you reach the desired shape.
Don't get frustrated, this takes lots of practice!! I prefer the rustic style, so imperfections don't bother me, but if you want a smooth finish all over, keep at it!Â
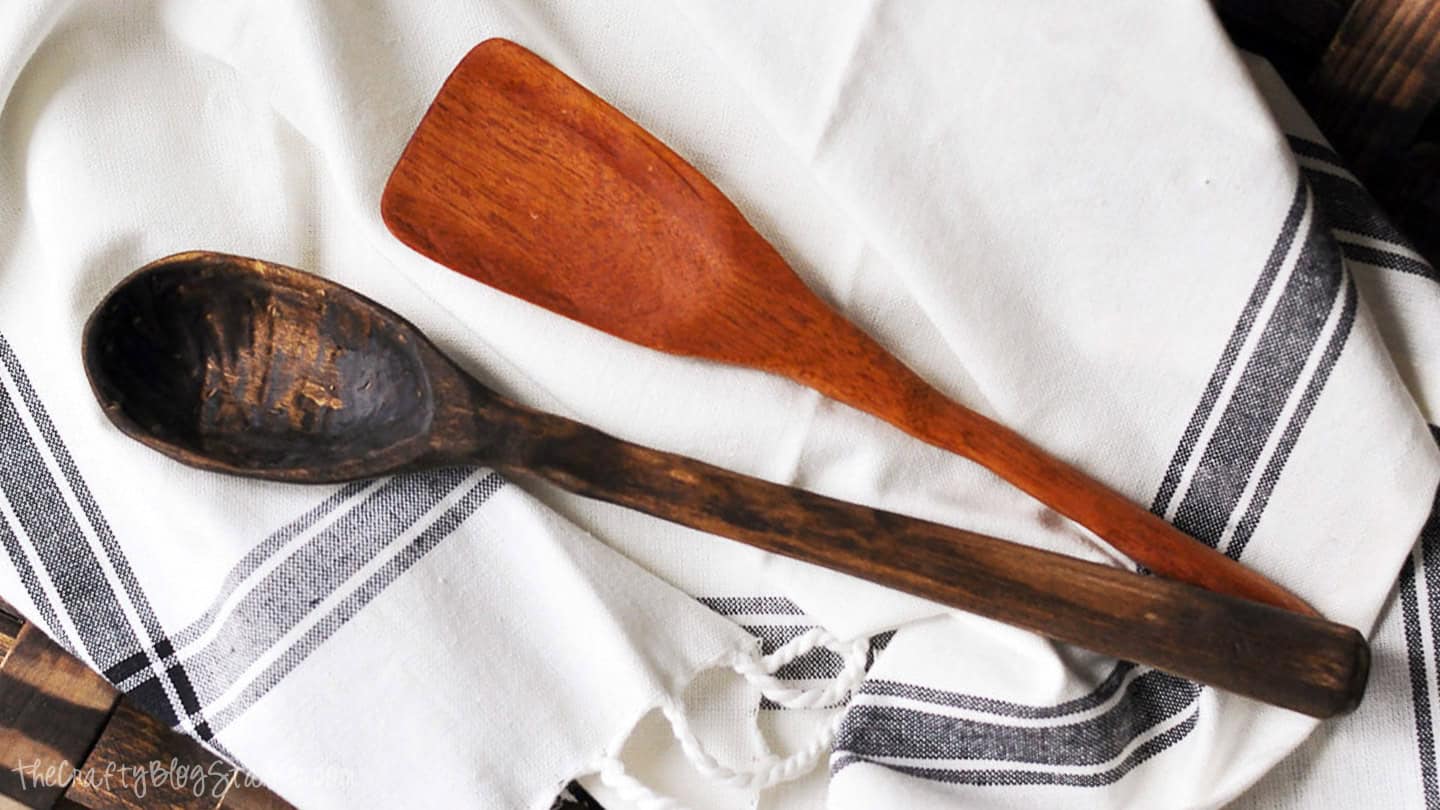
Finish with a wood food-safe oil. I like thisTried & True Wood Finish and Sealer.
These finished spoons are my new favorite tools in the kitchen! I grab them every time over my other wooden spoons.
Can you have too many bookmarks? I don't think so! Here are a few more fun ideas.
Hi, I'm Katie!
I'm so glad you're here. Want to make something fabulous? I'm here to help!
Materials Needed
- Fresh ingredients (vegetables, meats, herbs)
- Cooking oil or butter
- Salt and pepper
- Mixing bowls
- Cutting board and knife
- Measuring cups and spoons
- Cooking utensils (spatula, wooden spoon)
- Baking sheet or cooking pan
Step-by-Step Instructions
Prepare Your Materials
Gather all the required materials and tools. Make sure you have everything listed in the materials section before starting.
Set Up Your Workspace
Find a clean, well-lit area to work. Cover your surface with newspaper or a craft mat to protect it.
Follow the Main Steps
Carefully follow the instructions step by step. Take your time and don't rush through any part of the process.
Add Personal Touches
Once you've completed the basic project, feel free to add your own creative touches and personalization.
Final Assembly
Put all the pieces together according to the instructions. Double-check that everything is secure and properly attached.
Pro Tips
💡 Tip: Take your time and enjoy the creative process
💡 Tip: Don't be afraid to experiment with different colors or materials
💡 Tip: If you make a mistake, don't worry - it's all part of learning
💡 Tip: Share your finished project with friends and family
💡 Tip: Take photos of your progress to document your crafting journey
You Might Also Like

References & Further Reading
Explore these trusted resources to deepen your crafting knowledge and find more inspiration for your next project.
- Do It Yourself — Wikipedia Overview of DIY culture, history, and common techniques across woodworking, home improvement, and crafting.
- Handicraft — Wikipedia Background on traditional handicrafts, materials, and the cultural significance of handmade goods.
- Instructables Community-driven DIY project library with step-by-step photos, videos, and printable instructions.
- Woodworking — Wikipedia Techniques, tools, joinery methods, and the history of working with wood as a craft.
- Sewing — Wikipedia History and modern practice of sewing, including stitches, equipment, and fabric choices.
- Bob Vila Trusted home improvement, tool reviews, and illustrated how-to guides from a household name.
- Papercraft — Wikipedia Art forms that use paper as the primary medium, from origami to paper-mache.
- Michaels — Project Ideas Project walkthroughs, material lists, and weekly craft ideas from a major arts & crafts retailer.