Paper Advent Calendar Class with SVG
Project Overview
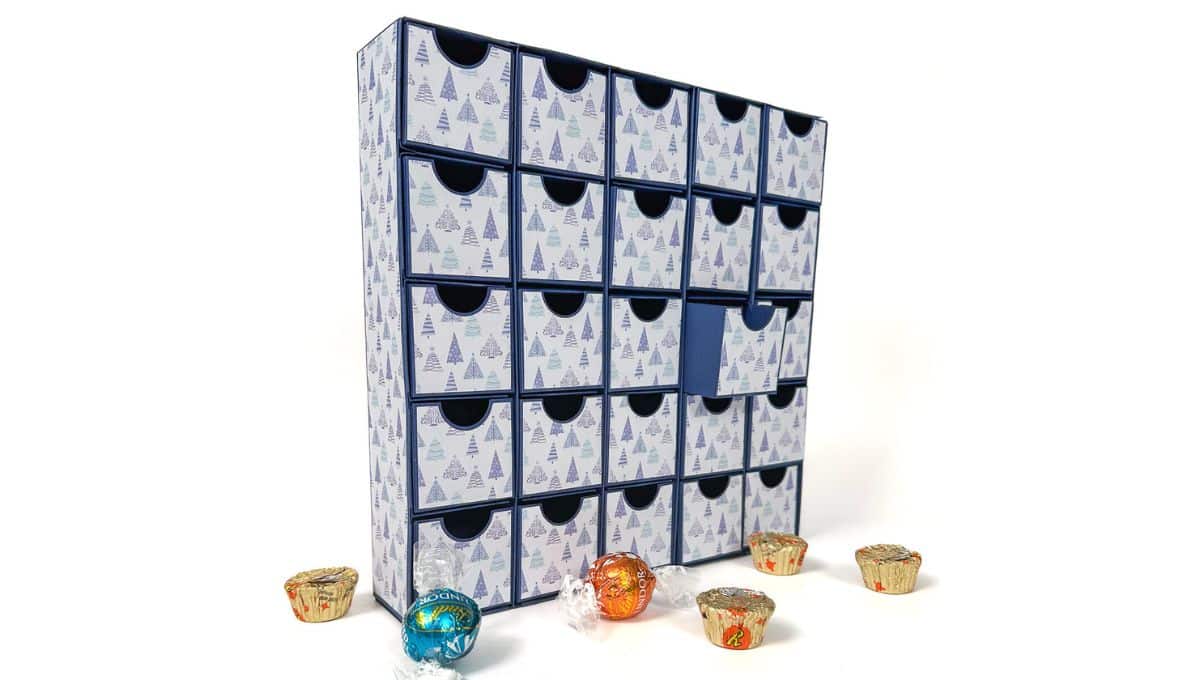
Countdown to Christmas with thisAdvent BoxSVG for Cricut or Silhouette! Download now to create personalized holiday surprises that are fun and festive.
The download includes SVG, DXF, PNG, and EPS files and comes with a commercial use license. See the full description below for terms and conditions and an important disclaimer.
A single zip file (or multiple zips if a jumbo bundle) with the following is included in the download. Files can be used, but are not limited to the following programs:
This is a digital product, so no physical product will be sent. ONCE PAYMENT IS COMPLETE, digital files will be available for download. You will receive an email with a link to download it.
Since this is a downloaded product, it is NON-REFUNDABLE.
*NO DIGITAL PRODUCT SALES ALLOWED*
*PLEASE ensure that your machine/program takes the above format before purchase. Due to the nature of digital files, refunds will not be given. *
IMPORTANT: Purchases are made with the understanding that you have a thorough understanding of your program. If you are unsure whether your program accepts one of the file types above, please know that you purchase at your own risk if the file does not work. I do not guarantee that these files will download or open properly on your smartphone. Laptops or desktop computers are best.
Some parts of this design can be challenging to weed if cut very small.
The buyer is responsible for ensuring that text, phrases, and quotes can be used commercially on shirts, mugs, bags, signs, etc. The Crafty Blog Stalker will not be held responsible for any copyright violation on the buyer's part. By purchasing this design, you agree to the terms of this disclaimer. Please refer toTESSto check for trademarks on quotes and phrases.
Materials Needed
- Colored cardstock or patterned paper
- Craft scissors or paper cutter
- Double-sided tape or glue stick
- Ruler and pencil
- Decorative elements (ribbons, stickers, washi tape)
- Cutting mat
- Scoring tool or bone folder
- Embellishments (buttons, sequins, stamps)
Step-by-Step Instructions
Prepare Your Materials
Gather all the required materials and tools. Make sure you have everything listed in the materials section before starting.
Set Up Your Workspace
Find a clean, well-lit area to work. Cover your surface with newspaper or a craft mat to protect it.
Follow the Main Steps
Carefully follow the instructions step by step. Take your time and don't rush through any part of the process.
Add Personal Touches
Once you've completed the basic project, feel free to add your own creative touches and personalization.
Final Assembly
Put all the pieces together according to the instructions. Double-check that everything is secure and properly attached.
Pro Tips
💡 Tip: Take your time and enjoy the creative process
💡 Tip: Don't be afraid to experiment with different colors or materials
💡 Tip: If you make a mistake, don't worry - it's all part of learning
💡 Tip: Share your finished project with friends and family
💡 Tip: Take photos of your progress to document your crafting journey
You Might Also Like
References & Further Reading
Explore these trusted resources to deepen your crafting knowledge and find more inspiration for your next project.
- Do It Yourself — Wikipedia Overview of DIY culture, history, and common techniques across woodworking, home improvement, and crafting.
- Handicraft — Wikipedia Background on traditional handicrafts, materials, and the cultural significance of handmade goods.
- Instructables Community-driven DIY project library with step-by-step photos, videos, and printable instructions.
- Woodworking — Wikipedia Techniques, tools, joinery methods, and the history of working with wood as a craft.
- Sewing — Wikipedia History and modern practice of sewing, including stitches, equipment, and fabric choices.
- Bob Vila Trusted home improvement, tool reviews, and illustrated how-to guides from a household name.
- Papercraft — Wikipedia Art forms that use paper as the primary medium, from origami to paper-mache.
- Michaels — Project Ideas Project walkthroughs, material lists, and weekly craft ideas from a major arts & crafts retailer.