Best Cricut for Beginners with Cricut Comparison Chart
Project Overview
Find the best Cricut machine with this easy comparison chart. Compare features side by side to find the right machine for your crafting style.
Starting out with Cricut crafting can feel a little overwhelming because there are several different machines, all with various features.
If you're wondering which one to choose, this guide will help you sort it out.
You'll get a simple comparison chart that lays out the differences clearly, so you can skip the guesswork.
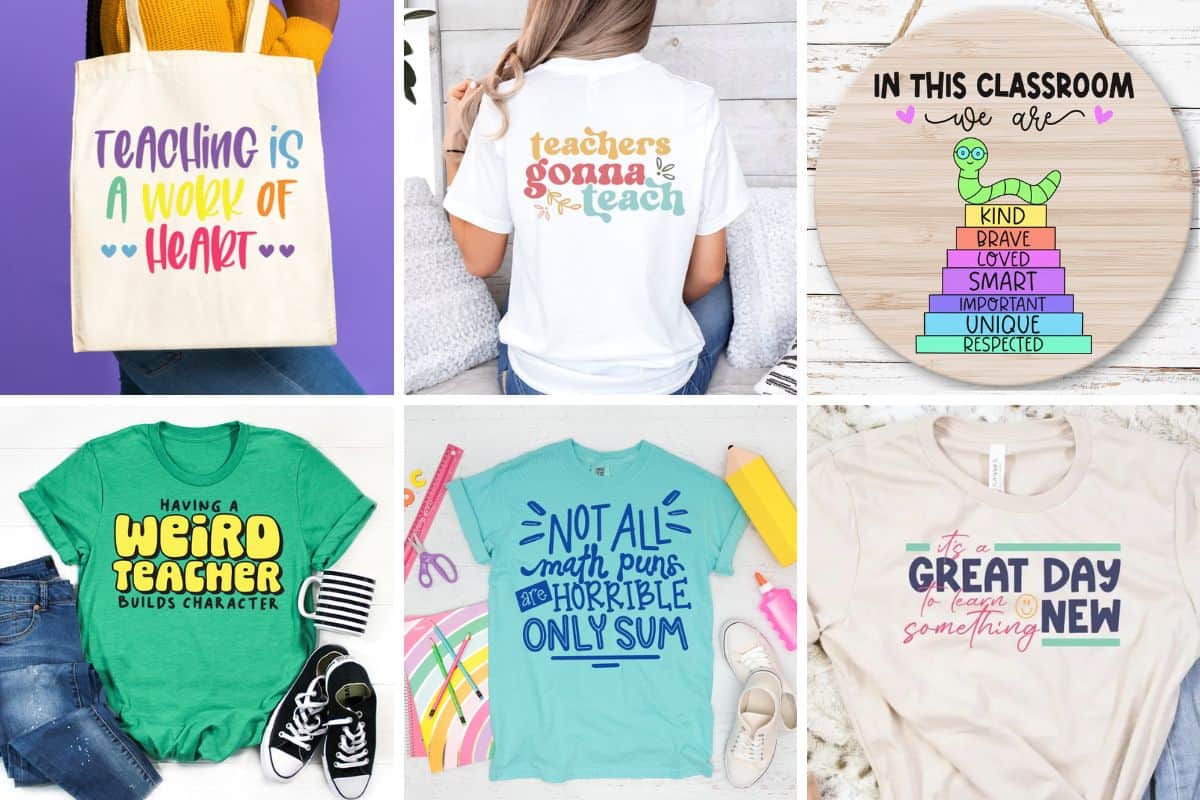
Whether your plans include shirts, cards, home decor, or all of the above, you'll be able to pick the machine that fits your budget and your crafting goals.
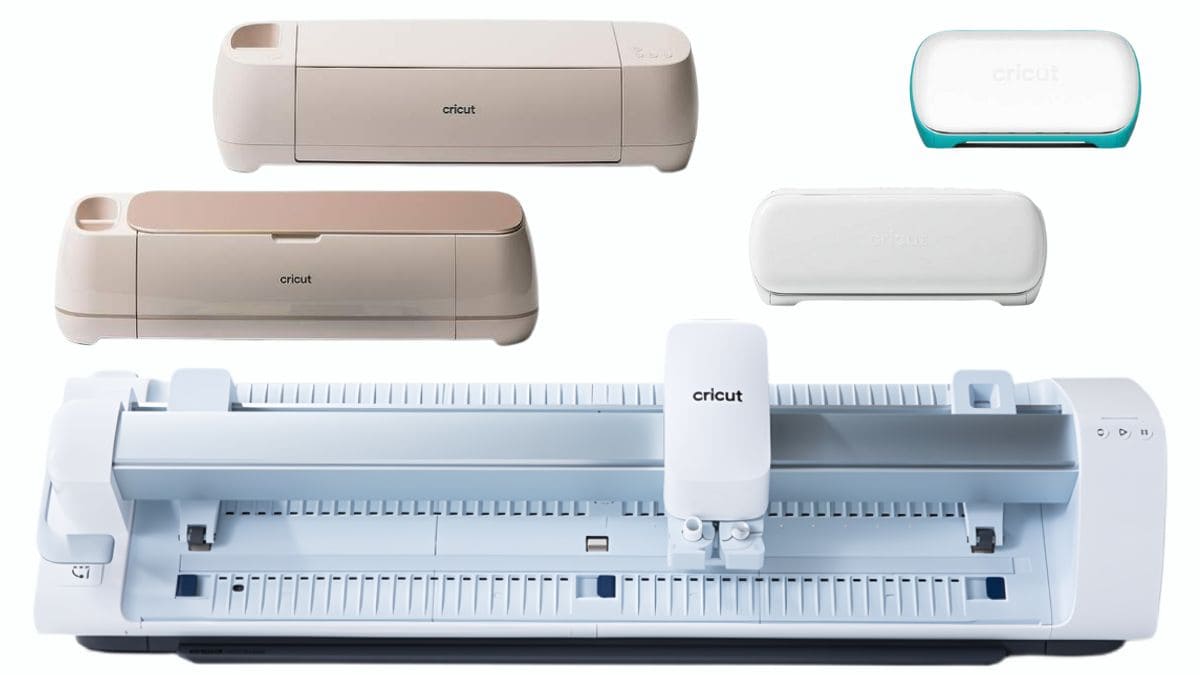
First, let's start with what machines are available. Cricut currently has 5 different cutting machine models.
Several of the machines have different model numbers, such as Explore, Explore 2, Explore 3, etc. The higher the number, the more recent the model.
I will start with the smallest and move up to the largest.
All machines are used with Cricut Design Space, which is the cutting software.
The software is free. However, the free version is very limited in its capabilities. To get the most out of your machine, I do recommend signing up for the subscription.
Cricut Accessis the monthly subscription program.
There are two plans, both priced at $9.99. The Premium Plan, however, is paid yearly instead of monthly, and it comes with a few more perks.
With both plans, you get access to over 200,00 graphics, 700 fonts, as well as discounts and exclusive deals.
With the Premium, you also get 20% off your materials purchases and free shipping on orders over $50.
When looking through Cricut Design Space's images and fonts, everything with the green A in the upper right corner is included with Cricut Access.
Learn more about, or sign up for Cricut Access.
I want to reiterate that you don't need a subscription to use your Cricut and Cricut Design Space, but it is an excellent option for avid crafters who produce a large quantity of items.
To make it easier to see all of the machines at once, I have created this comparison chart.
This chart does not list everything because it would be 5 pages long, but it provides the most commonly asked about information.
You may notice that for the Explore and Maker, I only list the 2 most recent versions.
While you can find previous versions, they are most typically second-hand or refurbished.
There is nothing wrong with these models, and they are an excellent option as a first Cricut.
The most significant difference with older models is that they cut slower and aren't compatible with Smart Materials.
This pros and cons list is based on my experience, as that is all I have to compare it to.
The only machine I do not have is the Cricut Joy Xtra. However, I do have a good understanding of its capabilities.
Pros
Cons
Pros
Cons
Pros
Cons
Pros
Cons
Pros
Cons
For budget-conscious crafters, the cost of the machine can be the most significant deciding factor, and I get that!
While all of the machines have a base price, they can go on sale at different retailers, in bundles, for various prices.
Suppose you are planning on purchasing the Cricut Design Space subscription. In that case, I recommend the bundle that includes the subscription and extra materials. This will always be the best value for the cost and is only available on Cricut.com.
Since sale prices can vary, I have included links below so you can easily compare prices between the different retailers. These links are for the machine only.
When deciding which machine to buy, consider asking yourself the following questions.
Does the cost matter?
Yes - start with the Joy or Joy Xtra. If you can afford the Xtra, I'd recommend that one because it has a few more capabilities and a slightly larger cutting area.
No - Go with the Maker, it does it all and you won't be disappointed.
Will I be selling what I make?
Yes - the Maker is commercial grade and is the faster cutting machine with a 12x12 cutting area.
No - the Explore is a great choice, still fast and cuts a variety of materials.
Will I be bulk producing?
Yes - the Venture is a great choice when you will be cutting and making a lot. You'll really notice the faster times and be able to get more done at once.
No - both the Explore and Maker are great options.
Is this my first cutting machine?
Yes - there is a learning curve with anything new. If you are easily intimidated, I recommend the Joy or Joy Xtra, as these machines are less daunting.
No - if you have experience with cutting machines, you will be much happier with the Explore or Maker.
Why buy the Maker over the Explore?
The most significant difference between the Maker and Explore is the number of materials it can cut and the tools it can use.
The Explore is an excellent choice if you know you'll mostly be cutting paper, vinyl, and heat transfer vinyl. This is the majority of what most people cut.
The Maker is designed for those who want to cut more specialty materials, such as leather, thin wood sheets, and fabric.
If you don't see yourself using those specialty materials, then the Explore will work great for you.
My preference for machines, and this is just my opinion, is Maker, Explore, Joy Xtra, Joy, and then Venture.
Here are a few tutorials that I have that can be used for each machine.
I hope this comparison has helped you narrow down which Cricut machine is right for you.
If you have any questions, you can reach out or simply comment on this post.
I love my Cricut cutting machines and have a lot of tutorials to share! Here are a few more of my favorites.
Hi, I'm Katie!
I'm so glad you're here. Want to make something fabulous? I'm here to help!
Hi, I'm Katie!
I'm so glad you're here. Want to make something fabulous? I'm here to help!
Materials Needed
- Colored cardstock or patterned paper
- Craft scissors or paper cutter
- Double-sided tape or glue stick
- Ruler and pencil
- Decorative elements (ribbons, stickers, washi tape)
- Cutting mat
- Scoring tool or bone folder
- Embellishments (buttons, sequins, stamps)
Step-by-Step Instructions
Prepare Your Materials
Gather all the required materials and tools. Make sure you have everything listed in the materials section before starting.
Set Up Your Workspace
Find a clean, well-lit area to work. Cover your surface with newspaper or a craft mat to protect it.
Follow the Main Steps
Carefully follow the instructions step by step. Take your time and don't rush through any part of the process.
Add Personal Touches
Once you've completed the basic project, feel free to add your own creative touches and personalization.
Final Assembly
Put all the pieces together according to the instructions. Double-check that everything is secure and properly attached.
Pro Tips
💡 Tip: Take your time and enjoy the creative process
💡 Tip: Don't be afraid to experiment with different colors or materials
💡 Tip: If you make a mistake, don't worry - it's all part of learning
💡 Tip: Share your finished project with friends and family
💡 Tip: Take photos of your progress to document your crafting journey
You Might Also Like
References & Further Reading
Explore these trusted resources to deepen your crafting knowledge and find more inspiration for your next project.
- Do It Yourself — Wikipedia Overview of DIY culture, history, and common techniques across woodworking, home improvement, and crafting.
- Handicraft — Wikipedia Background on traditional handicrafts, materials, and the cultural significance of handmade goods.
- Instructables Community-driven DIY project library with step-by-step photos, videos, and printable instructions.
- Woodworking — Wikipedia Techniques, tools, joinery methods, and the history of working with wood as a craft.
- Sewing — Wikipedia History and modern practice of sewing, including stitches, equipment, and fabric choices.
- Bob Vila Trusted home improvement, tool reviews, and illustrated how-to guides from a household name.
- Papercraft — Wikipedia Art forms that use paper as the primary medium, from origami to paper-mache.
- Michaels — Project Ideas Project walkthroughs, material lists, and weekly craft ideas from a major arts & crafts retailer.