DIY Pom Pom Ribbon Christmas Tree Decoration
Project Overview
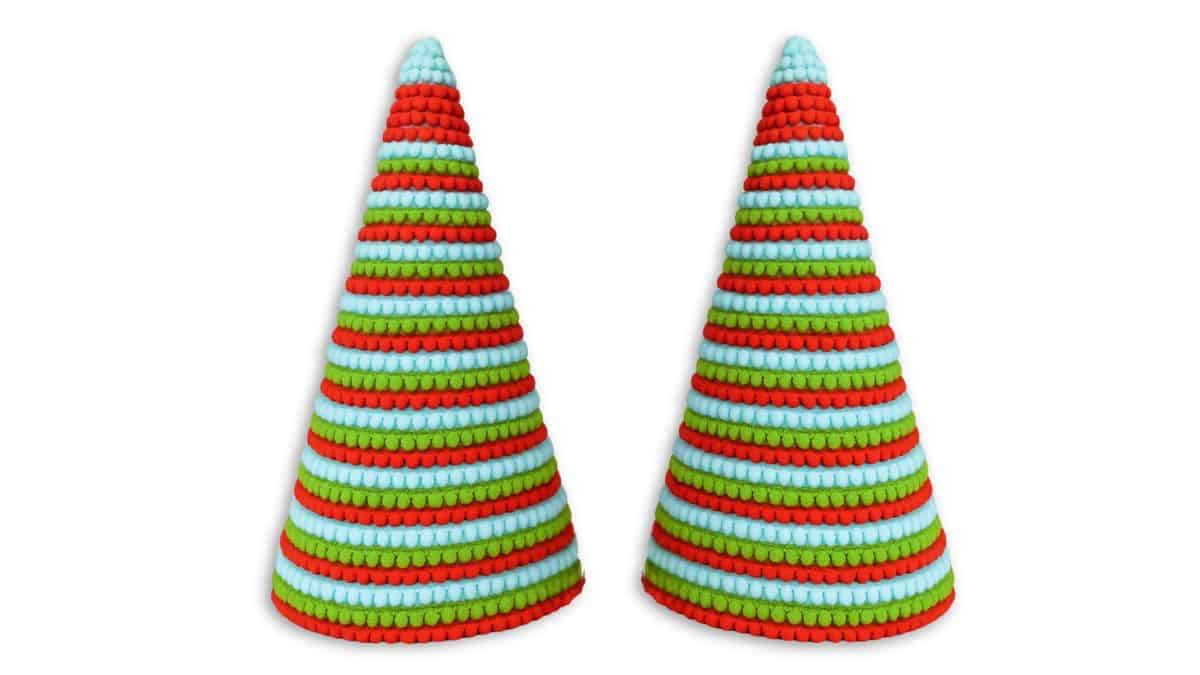
Create a DIY ribbon Christmas tree using pom poms for a cozy, handmade decoration. Perfect for adding a little festive charm to any room.
If you love handmade holiday decor, this project is right up your alley.
A pom pom ribbon Christmas tree is a fun and simple way to add color and texture to your space.
It's great for crafters of any skill level and easy enough to make while watching your favorite holiday movie.
Plus, it's the kind of decoration that makes everyone ask where you bought it, only you'll know it came from your craft table.
Since your cone may be a different size than mine, you may need more or less ribbon trim.
So this is really easy to make, I promise! The hardest part is making the cone.
Start with the 12x12 cardstock sheet and make a cone.
To do this, I tied a string around a pencil, held the end of the string in one corner, and used it like a compass to draw a pie shape from one corner to the next.
Or if you prefer, you can just buy apaper mache cone.
I glued three strands onto the cone at a time.
Start at the bottom and glue them into place using a hot glue gun.
Wrap the trim around, gluing a few spots along the way until you meet back up with where you started.
Glue right next to the raw edge and trim off the excess.
Keep repeating until the cone is completely covered.
So easy and it looks so cute!
Don't put those craft supplies away yet. Here are a few more fun things to make for the holiday season!
Hi, I'm Katie!
I'm so glad you're here. Want to make something fabulous? I'm here to help!
Materials Needed
- Colored cardstock or patterned paper
- Craft scissors or paper cutter
- Double-sided tape or glue stick
- Ruler and pencil
- Decorative elements (ribbons, stickers, washi tape)
- Cutting mat
- Scoring tool or bone folder
- Embellishments (buttons, sequins, stamps)
Step-by-Step Instructions
Prepare Your Materials
Gather all the required materials and tools. Make sure you have everything listed in the materials section before starting.
Set Up Your Workspace
Find a clean, well-lit area to work. Cover your surface with newspaper or a craft mat to protect it.
Follow the Main Steps
Carefully follow the instructions step by step. Take your time and don't rush through any part of the process.
Add Personal Touches
Once you've completed the basic project, feel free to add your own creative touches and personalization.
Final Assembly
Put all the pieces together according to the instructions. Double-check that everything is secure and properly attached.
Pro Tips
💡 Tip: Take your time and enjoy the creative process
💡 Tip: Don't be afraid to experiment with different colors or materials
💡 Tip: If you make a mistake, don't worry - it's all part of learning
💡 Tip: Share your finished project with friends and family
💡 Tip: Take photos of your progress to document your crafting journey
You Might Also Like


References & Further Reading
Explore these trusted resources to deepen your crafting knowledge and find more inspiration for your next project.
- Do It Yourself — Wikipedia Overview of DIY culture, history, and common techniques across woodworking, home improvement, and crafting.
- Handicraft — Wikipedia Background on traditional handicrafts, materials, and the cultural significance of handmade goods.
- Instructables Community-driven DIY project library with step-by-step photos, videos, and printable instructions.
- Woodworking — Wikipedia Techniques, tools, joinery methods, and the history of working with wood as a craft.
- Sewing — Wikipedia History and modern practice of sewing, including stitches, equipment, and fabric choices.
- Bob Vila Trusted home improvement, tool reviews, and illustrated how-to guides from a household name.
- Papercraft — Wikipedia Art forms that use paper as the primary medium, from origami to paper-mache.
- Michaels — Project Ideas Project walkthroughs, material lists, and weekly craft ideas from a major arts & crafts retailer.