Post-It Note Holder for a Handmade Gift
Project Overview
Learn to craft a Post-It Note Holder as a thoughtful handmade gift, perfect for teachers or coworkers. Simple, appreciated, and personal!
Welcome to a delightful DIY project where you'll learn how to create a charming and practical Post-It Note Holder. This small gift is perfect for teachers, coworkers, or anyone who could use a bit of organized cheer in their daily lives.
Whether you're a seasoned crafter or a beginner, this tutorial will guide you through each step, resulting in a gift that's not only useful but also deeply appreciated.
Let's get crafting and spread some joy with this custom Post-It Note Holder!
Some links may direct you to similar items when the exact item is not available online.
Start by cutting two 2 ½-inch circles from different colored card stock. As an option, you can add texture to one circle using an embossing folder and the Big Shot.
Place one circle halfway over the other and trim the excess using a 2 ½-inch cutter. Cut a small half-circle at the top with the 1-inch paper punch to form owl ears.
For the eyes, cut two 1-inch circles and glue on googly eyes.
For the feet, cut 2 of the flowers with the Flower Punch, and glue them to the base of the body.
For the beak, trim a flower shape, glue it behind the eyes, and then attach it to the body.
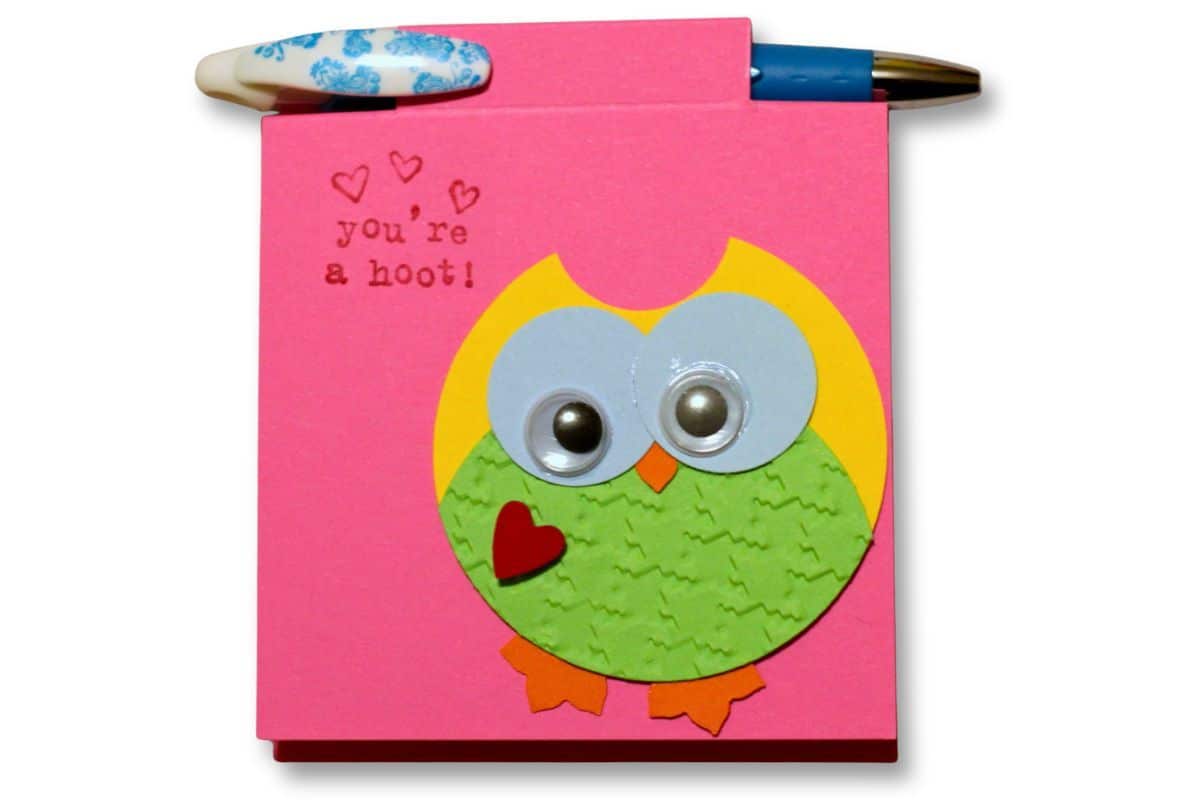
When the owl is completely assembled he is so cute!
I ended up making lots of paper owls because I am making several sticky note holders for gifts.
Begin by cutting a sheet of card stock into strips that measure 3 ½ x 8 ½ inches. This will be the base paper of the Post-it Note Holder.
Score the rectangle at 3 ½, 4 and 4 ½ inches. At ¾ inch in from each side, cut a straight line across the score lines. This notch is for the pen holder.
On the outer edges fold inward and fold outward on the center score marks.
You may notice that one-half is slightly longer than the other half. This is not a mistake, it is supposed to be that way.
Put glue on the outer pieces on the bottom of the fold and adhere it to the side of the piece of paper that is just a bit longer.
It should look like this when folded over and glued in place.
Adhere the Post-It note inside the holder, by applying adhesive to the back of the sticky notes.
Use a stamp with a cute owl saying, and stamp the design onto the top flap of the holder.
Apply glue to the back of the paper owl, and press that onto the holder, as well.
When it is all put together it will look like this!
I made a lot of these fun Post-it Note Holders to give to my kid's teachers, and to my coworkers for Valentine's Day. They turned out so cute!
Materials Needed
- Colored cardstock or patterned paper
- Craft scissors or paper cutter
- Double-sided tape or glue stick
- Ruler and pencil
- Decorative elements (ribbons, stickers, washi tape)
- Cutting mat
- Scoring tool or bone folder
- Embellishments (buttons, sequins, stamps)
Step-by-Step Instructions
Prepare Your Materials
Gather all the required materials and tools. Make sure you have everything listed in the materials section before starting.
Set Up Your Workspace
Find a clean, well-lit area to work. Cover your surface with newspaper or a craft mat to protect it.
Follow the Main Steps
Carefully follow the instructions step by step. Take your time and don't rush through any part of the process.
Add Personal Touches
Once you've completed the basic project, feel free to add your own creative touches and personalization.
Final Assembly
Put all the pieces together according to the instructions. Double-check that everything is secure and properly attached.
Pro Tips
💡 Tip: Take your time and enjoy the creative process
💡 Tip: Don't be afraid to experiment with different colors or materials
💡 Tip: If you make a mistake, don't worry - it's all part of learning
💡 Tip: Share your finished project with friends and family
💡 Tip: Take photos of your progress to document your crafting journey
You Might Also Like
References & Further Reading
Explore these trusted resources to deepen your crafting knowledge and find more inspiration for your next project.
- Do It Yourself — Wikipedia Overview of DIY culture, history, and common techniques across woodworking, home improvement, and crafting.
- Handicraft — Wikipedia Background on traditional handicrafts, materials, and the cultural significance of handmade goods.
- Instructables Community-driven DIY project library with step-by-step photos, videos, and printable instructions.
- Woodworking — Wikipedia Techniques, tools, joinery methods, and the history of working with wood as a craft.
- Sewing — Wikipedia History and modern practice of sewing, including stitches, equipment, and fabric choices.
- Bob Vila Trusted home improvement, tool reviews, and illustrated how-to guides from a household name.
- Papercraft — Wikipedia Art forms that use paper as the primary medium, from origami to paper-mache.
- Michaels — Project Ideas Project walkthroughs, material lists, and weekly craft ideas from a major arts & crafts retailer.