Homemade Wind Chimes with Sea Glass
Project Overview
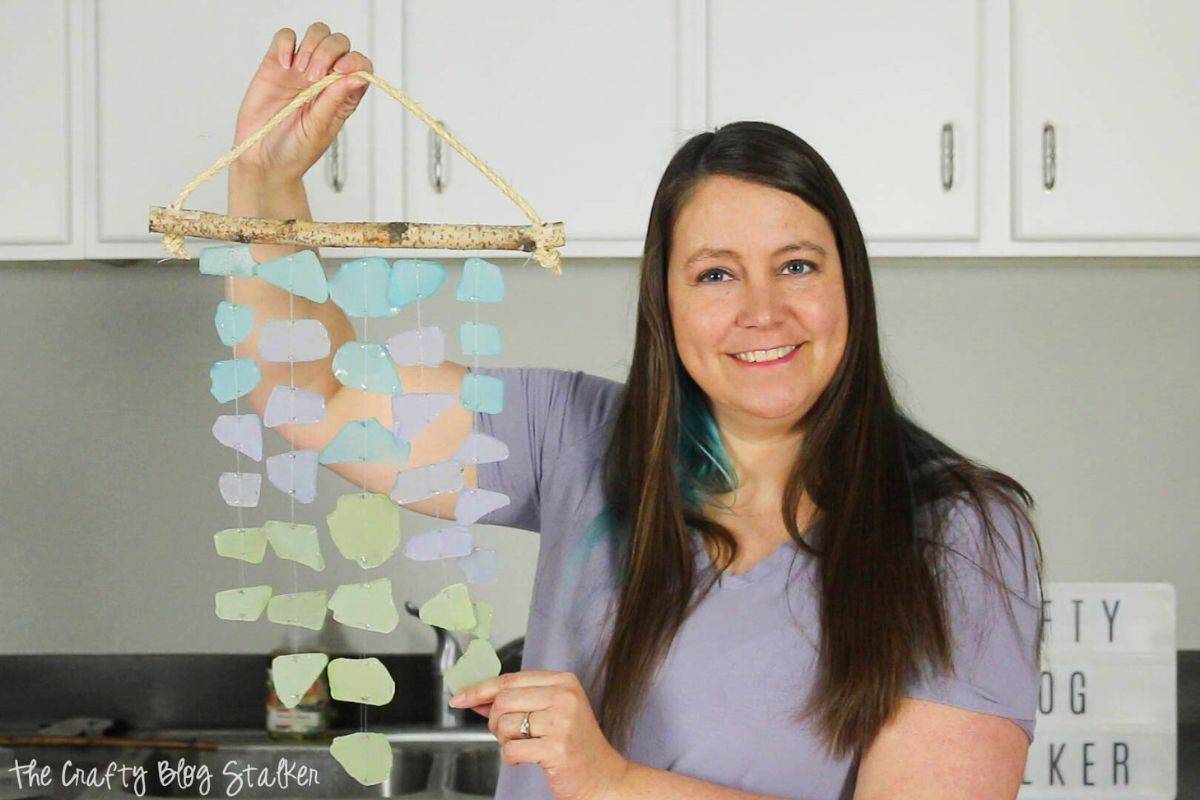
Homemade wind chimes are easier than you think! This sea glass DIY is perfect for adding a touch of color and calm to your outdoor space.
I love to relax on the porch, surrounded by a light breeze and the soothing sounds of wind chimes in the background.
Enhance your outdoor moments with a handmade sea glass wind chime.
This easy DIY tutorial will guide you to make wind chimes, perfect for any serene setting.
This project is not just a fun craft, but also adds a touch of coastal charm to your space.
Like videos? I have a video tutorial for you!Please subscribe to my YouTube Channelso you don't miss out on any future video tutorials!
Some links may direct you to similar items when the exact item is not available online.
Begin by printing the free printable template.
It will print on two pages. Using some transparent tape, layer the edges over each other and tape the two sheets together.
Then tape the template to your table or work surface so it doesn't move.
Begin by sorting the different-sized seaglass pieces onto the template. Use the gray squares as a size reference tool.
Once all the sea glass pieces are in place, you can experiment with the order.
Do you want the colors to be random, or do you want them to follow an ombre effect?
I decided on the ombre look.
Down the center of each column of squares is a line. This line is a guide for the fishing line.
Above the template, tape a strand of fishing line. Pull it down past the other end of the template, tape the end down, then cut the line.
Repeat for all 5 columns.
To glue the fishing line to the sea glass pieces, use the E6000 glue and apply a dot of glue over the fishing line at the top and bottom of each sea glass piece.
Let the glue dry for at least 30 minutes.
When the glue is dry, leave the strands of fishing line taped to the counter and flip all of the glass pieces over so the fishing line is now on the bottom.
Lay the second strand of fishing line over the top of the rows of sea glass just like before.
Again, glue the line to each sea glass piece at the top and the bottom with a dot of E6000 glue.
Let the glue dry for 30 minutes.
For the top of the wind chime, I used a stick that I cut to 12 inches.
If you have the tools, drill a hole about a ¾-inch in on each side.
Feed the rope through the holes and tie knots to hold the ends.
Don't have a drill? Simply wrap the rope around the end of the stick and secure it with a knot.
Each method will work just fine, but if you opt for the wrapping method, you will want to use a thinner rope.
Lay the wood piece along the top of the sea glass columns.
For each strand of sea glass, the top strand of the fishing line should go on top of the piece of wood, and the bottom strand under the piece of wood.
Tie a knot, right over left and then left over right, around the wood piece. This type of knot allows the length of the rows to be adjusted.
Hang the wind chime and adjust the sea glass columns. You want them close enough to "clink" when they hit each other, but not so close that they are on top of each other.
To make them shorter, tighten the knot at the top. To make them longer, pull on the strand.
Once the columns are tied in place, apply a small dot of E6000 glue to the knots to secure them to the wood.
Trim the ends of the fishing line, close to the bottom of the glass pieces, and at the top near the knots.
All that's left is to hang your new DIY wind chimes in the backyard or patio, grab your favorite refreshing drink, and relax outside on that comfy chair!
After all, you've earned it!
This is a beautiful wind chime, and it was a lot of fun to make!
The sea glass is fragile and should be brought inside before any large storms.
I actually made a second one because I learned this lesson with the first one I made. ÄŸËâ?/p>
Since it's warm, spend more time outdoors with these fun crafts!
Hi, I'm Katie!
I'm so glad you're here. Want to make something fabulous? I'm here to help!
Materials Needed
- Colored cardstock or patterned paper
- Craft scissors or paper cutter
- Double-sided tape or glue stick
- Ruler and pencil
- Decorative elements (ribbons, stickers, washi tape)
- Cutting mat
- Scoring tool or bone folder
- Embellishments (buttons, sequins, stamps)
Step-by-Step Instructions
Prepare Your Materials
Gather all the required materials and tools. Make sure you have everything listed in the materials section before starting.
Set Up Your Workspace
Find a clean, well-lit area to work. Cover your surface with newspaper or a craft mat to protect it.
Follow the Main Steps
Carefully follow the instructions step by step. Take your time and don't rush through any part of the process.
Add Personal Touches
Once you've completed the basic project, feel free to add your own creative touches and personalization.
Final Assembly
Put all the pieces together according to the instructions. Double-check that everything is secure and properly attached.
Pro Tips
💡 Tip: Take your time and enjoy the creative process
💡 Tip: Don't be afraid to experiment with different colors or materials
💡 Tip: If you make a mistake, don't worry - it's all part of learning
💡 Tip: Share your finished project with friends and family
💡 Tip: Take photos of your progress to document your crafting journey
You Might Also Like


References & Further Reading
Explore these trusted resources to deepen your crafting knowledge and find more inspiration for your next project.
- Do It Yourself — Wikipedia Overview of DIY culture, history, and common techniques across woodworking, home improvement, and crafting.
- Handicraft — Wikipedia Background on traditional handicrafts, materials, and the cultural significance of handmade goods.
- Instructables Community-driven DIY project library with step-by-step photos, videos, and printable instructions.
- Woodworking — Wikipedia Techniques, tools, joinery methods, and the history of working with wood as a craft.
- Sewing — Wikipedia History and modern practice of sewing, including stitches, equipment, and fabric choices.
- Bob Vila Trusted home improvement, tool reviews, and illustrated how-to guides from a household name.
- Papercraft — Wikipedia Art forms that use paper as the primary medium, from origami to paper-mache.
- Michaels — Project Ideas Project walkthroughs, material lists, and weekly craft ideas from a major arts & crafts retailer.