Free DIY Outdoor Bench Plans
Project Overview
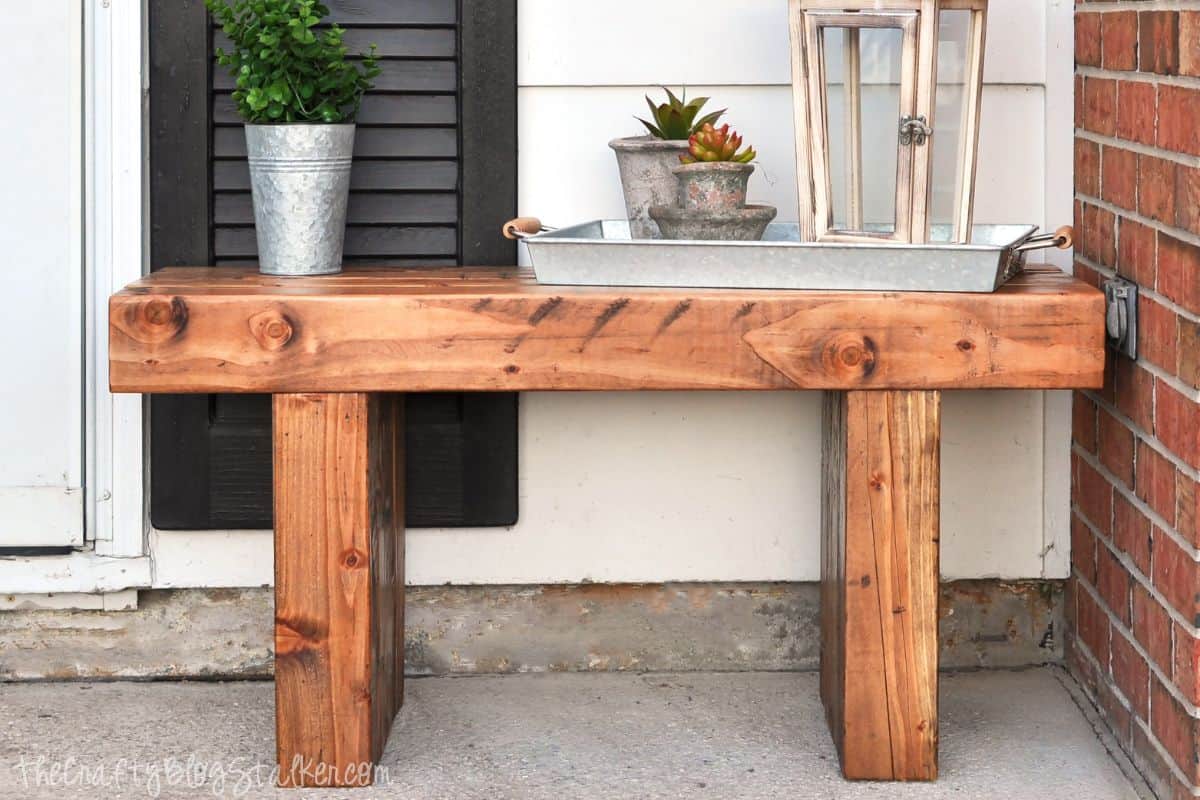
Get the look of a custom bench without the price tag. These DIY outdoor bench plans walk you through the process, even if you're new to carpentry.
The snow has finally melted, and I'm way too excited to be outside again.
With the warmer weather calling, I've got a super simple DIY outdoor bench project to share.
It's easy to build, doesn't require a ton of tools, and let me tell you-this thing is sturdy.
Like, "don't even try to move it without help," kind of sturdy.
Estimated Cost:$120
Step 1: On all 8 of the 4 in. x 4 in. x 14 ½ in. pieces, make two pocket holes at the top using the Kreg Jig.
With 6 of the 4x4's, make 3 pocket holes spaced evenly along the horizontal sides.
Join (4) 4x4's to make one leg with 2 ½" Kreg screws and exterior wood glue.
Repeat for the second leg.
Step 2:On 3 of the 4 in. x 4 in. x 36 in. pieces, make 3 pocket holes along the horizontal edge, spaced evenly.
Join all 4 pieces together with pocket hole screws and exterior wood glue.
Step 3: Measure 6" from the edge and line up your legs.
Attach to the bottom side of your bench top using pocket hole screws and wood glue.
Step 4:Fill all pocket holes with either wood plugs or wood filler (let dry) and sand the entire bench, working your way up to 220 grit sandpaper.
Round the edges on the final sanding, if desired, to avoid sharp edges.
Step 5:Apply stain and exterior sealant according to the product's instructions.
This new bench sits right outside my front door, which seems to be the mailman's new favorite place to put all my boxes!
I really do love this bench. It provides a nice place to sit (or put packages), and it just looks so lovely on my front porch!
Don't put those power tools away yet. There are more fun things to make!
Hi, I'm Katie!
I'm so glad you're here. Want to make something fabulous? I'm here to help!
Materials Needed
- Colored cardstock or patterned paper
- Craft scissors or paper cutter
- Double-sided tape or glue stick
- Ruler and pencil
- Decorative elements (ribbons, stickers, washi tape)
- Cutting mat
- Scoring tool or bone folder
- Embellishments (buttons, sequins, stamps)
Step-by-Step Instructions
Prepare Your Materials
Gather all the required materials and tools. Make sure you have everything listed in the materials section before starting.
Set Up Your Workspace
Find a clean, well-lit area to work. Cover your surface with newspaper or a craft mat to protect it.
Follow the Main Steps
Carefully follow the instructions step by step. Take your time and don't rush through any part of the process.
Add Personal Touches
Once you've completed the basic project, feel free to add your own creative touches and personalization.
Final Assembly
Put all the pieces together according to the instructions. Double-check that everything is secure and properly attached.
Pro Tips
💡 Tip: Take your time and enjoy the creative process
💡 Tip: Don't be afraid to experiment with different colors or materials
💡 Tip: If you make a mistake, don't worry - it's all part of learning
💡 Tip: Share your finished project with friends and family
💡 Tip: Take photos of your progress to document your crafting journey
You Might Also Like
References & Further Reading
Explore these trusted resources to deepen your crafting knowledge and find more inspiration for your next project.
- Do It Yourself — Wikipedia Overview of DIY culture, history, and common techniques across woodworking, home improvement, and crafting.
- Handicraft — Wikipedia Background on traditional handicrafts, materials, and the cultural significance of handmade goods.
- Instructables Community-driven DIY project library with step-by-step photos, videos, and printable instructions.
- Woodworking — Wikipedia Techniques, tools, joinery methods, and the history of working with wood as a craft.
- Sewing — Wikipedia History and modern practice of sewing, including stitches, equipment, and fabric choices.
- Bob Vila Trusted home improvement, tool reviews, and illustrated how-to guides from a household name.
- Papercraft — Wikipedia Art forms that use paper as the primary medium, from origami to paper-mache.
- Michaels — Project Ideas Project walkthroughs, material lists, and weekly craft ideas from a major arts & crafts retailer.